
|
How to Create a Digital Certificate |
| Jesse Burkhardt |
- You must first use the Wizard on your Web Server to prepare a Certificate Request.
- Then you must go to a Certificate Authority and ask for a Certificate. If you use one of the major CA's (Verisign, Thawte) it will cost $150 or more per year, but your secure pages will be served to the browser with no warning. You may also go to skyBuilders Certificate Authority. It may take some time for any CA to process your request, including skyBuilders CA, because they must verify your identity.
- When your Certificate is ready, you download it and install it in the web server.
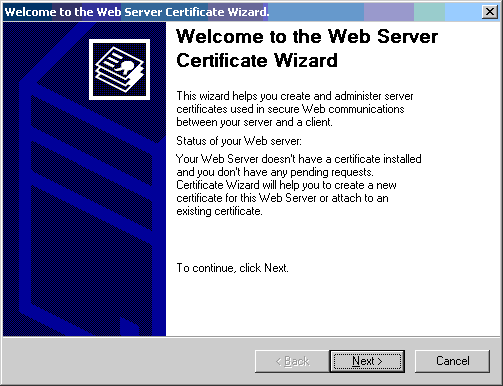
- This starts the Web Server Certificate Wizard, click Next:
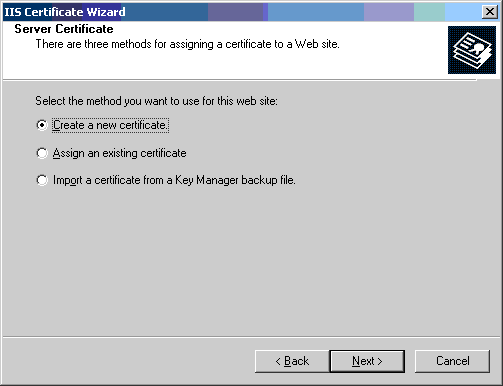
- Choose "Create a new certificate".
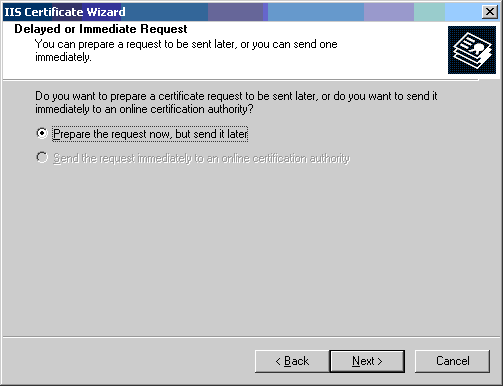
- Choose "Prepare the request now, but send it later".
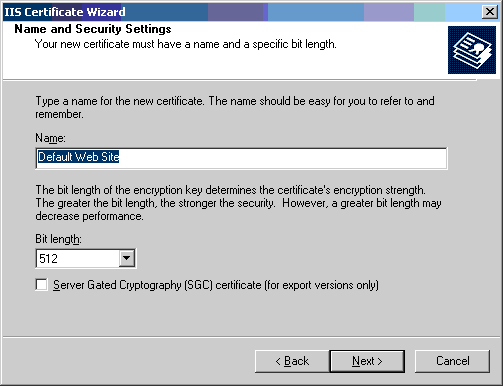
- Choose a Default Web Site name.
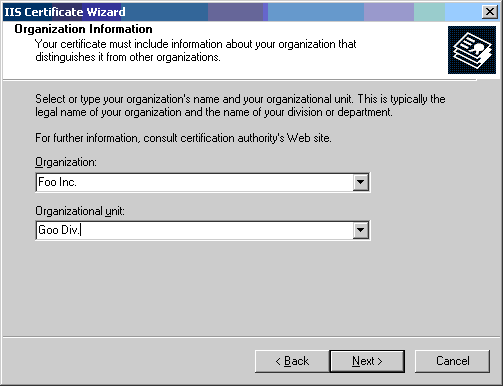
- Fill in Organization info.
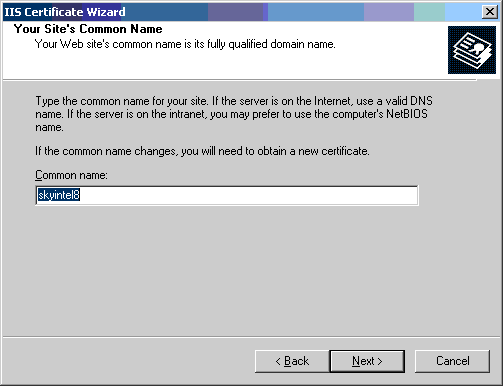
- Fill in Common name: (Name of your computer).
- Fill in Geographical Info.

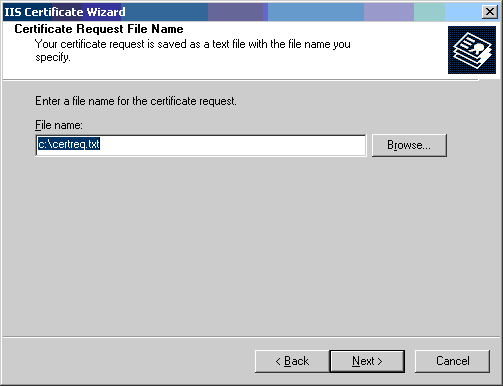
- Certificate Request File Name - will default to c:\certreq.txt (If it already exists, choose to replace it)
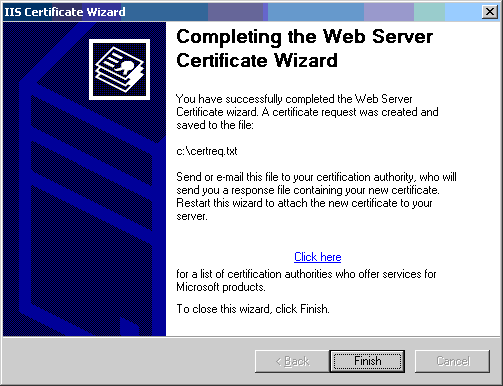
- Request File Summary - click Next.

- Finish the wizard and click OK.
- Choose "Create a new certificate".
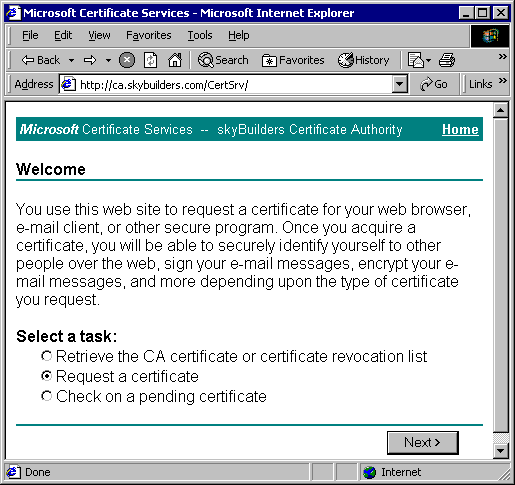
- Go to Certificate Services Web Site - eg., http://your computer/certsrv (example pictures below, using http://ca.skybuilders.com/certsrv).
- Choose "Request a certificate"
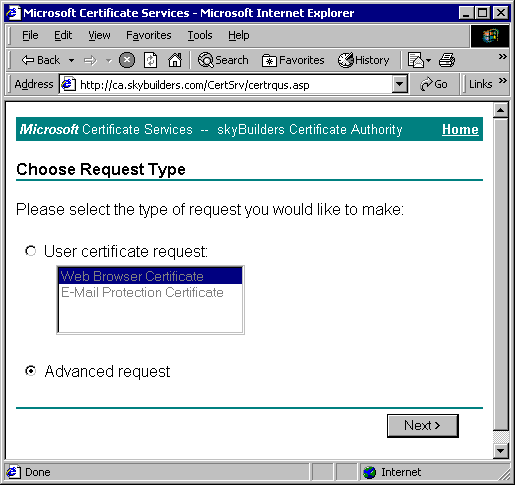
- Choose "Advanced Request".
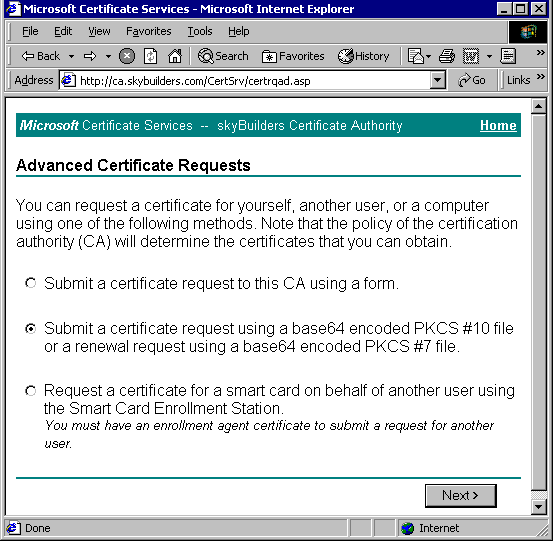
- Choose "Submit a certificate request using a base64 encoded PKCS #10 file or a renewal request using a base64 encoded PKCS #7 file".
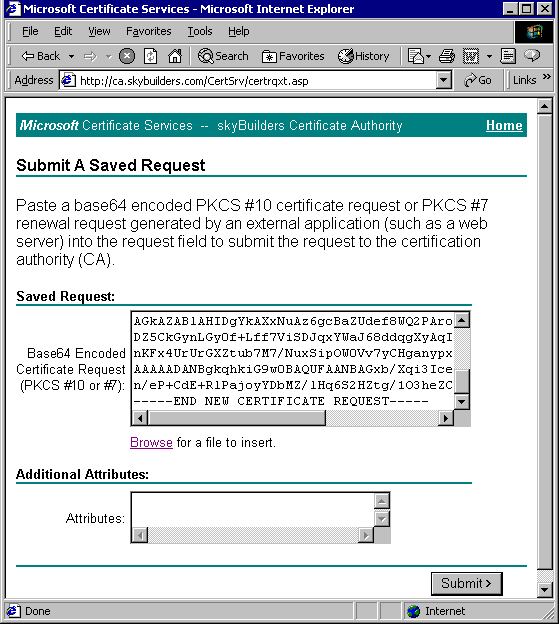
- Under "Saved Request" box, click "Browse" and click on to your previously saved certreq.txt file. It should appear in "File Name".
- Click "Read" and the Certificate Request will appear in the "Base64 Encoded Certificate Request" box.
- Choose "Request a certificate"
- Click Submit and close browser.
- From the Start Bar open Administrative Tools, then Certification Authority:
- You should see your newly requested Certificate under "Pending Requests".

- Right-Click and issue it. It should show up under "Issued Certificates"
- You should see your newly requested Certificate under "Pending Requests".
- Go back to the Certificate Services Web Site - http://your computer/certsrv
- Select "Check on a pending certificate"
- You should see your highlighted certificate in the box. Click Next.
- You should see this message: "The certificate you requested was issued to you" (DER encoded is fine?)
- Choose "Download CA Certificate" and open file from download location.
- You will now see your certificate:
- Issued to: Your computer
- Issued by: The Trusted CA Authority
- Choose "Install Certificate" which will bring you to:
- The Certificate Import Wizard:
- Choose "Automatically select the certificate...."
- Click finish and you should get "The import was successful" pop-up box.
- Click OK and then OK to close the "Certificate" window
- In the IIS Manager:
- Right click and select Web Site Properties.
- Now open the Directory Security Tab.
- Go to Secure Communications, Server Certificate.
- This starts the Web Server Certificate Wizard.
- Choose "Assign an existing certificate".
- In the "Select a certificate" window, highlight your certificate, click Next.
- Certificate Summary window, click Next.
- Finish.
- Secure Communications: Server Certificate, View Certificate, and Edit should now be highlighted.
- Click Windows Start Menu and select Run. Entering mmc as a command will open the Microsoft Management Console (MMC) interface.
In Microsoft Management Console (MMC):
- Select Control-M to add Snap-in.
- In the Add/Remove Snap-in window, click the Add button.
- In Add Standalone Snap-in window, choose Certificates and click the Add button.
- Choose My User Account and click the Finish button. (The Certificates for current user should appear in the Snap-in window.)
- Select the Add button.
- Choose Certificates and click the Add button.
- Choose Computer Account and click the Next button.
- Choose Local Computer and click the Finish button.
- The Certificates for local computer should appear in the Snap-in window.
- Select OK should return you to Console Root window.
- In the Console Root window, there should be 2 certificates:
- Current User and Local Computer
- Go to Certificates Current User (Trusted Root Certification Authorities/Certificates) directory and copy the certificate that was issued to you.
- Go to Certificates Local Computer (Trusted Root Certification.
- Authorities/Certificates) directory and paste the certificate.
- Save the console and The Sample Client Site should function successfully.
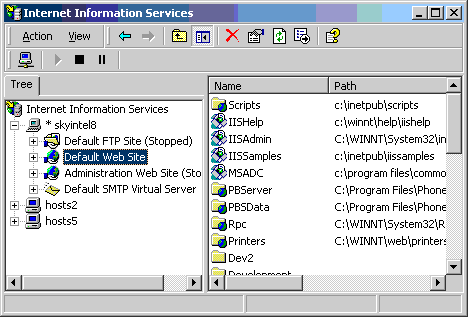
To prepare a Certificate request, Open Internet Service Manager, IIS. (In the picture below we openned IIS by navigating from the Start bar to Administration Tools and then Internet Information Services.)
Right click the highlighted web site (Default Web Site in this case) and select Properties. Open the Directory Security Tab and click the Server Certificate button in Secure Communications box. (Secure Communications: Server Certificate will be highlighted but View Certificate, and Edit will not be highlighted.)
