 For information on general hardware and connectivity requirements please refer the Windows NT 4.x Web Site Installation documentation.
skyBuilders - 2002/1/17
For information on general hardware and connectivity requirements please refer the Windows NT 4.x Web Site Installation documentation.
Start > Programs > Administrative Tools > Computer Management > Internet Information Services.
This opens the Internet Information Services panel.
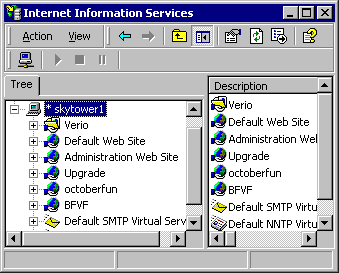
Right click on the name of the web hosting computer, which, in the pictured example above, is "skytower1" marked by the asterisk.
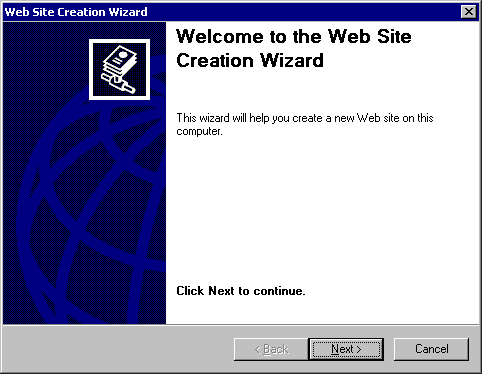
Then click on New > Web Site, causing the Web Site Creation Wizard to appear. And click the Next button.
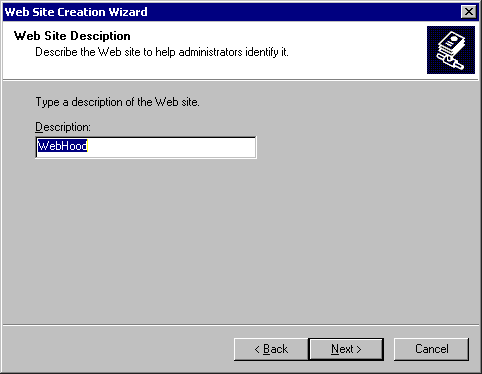
Give a meaningful name to the web site you are creating.
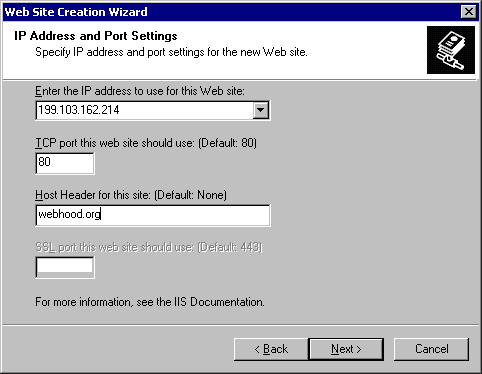
Enter the IP address, TCP port number (80), and the domain name of the web site as follows:
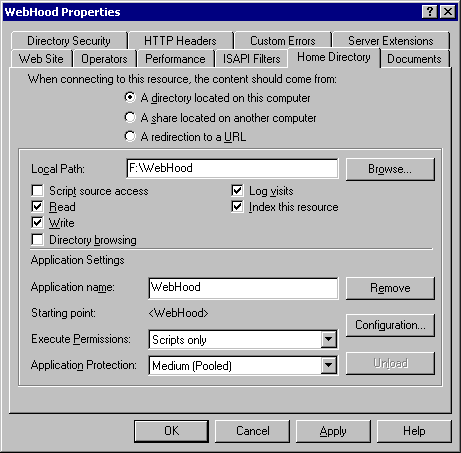
Also under the Home Directory tab, under Application Settings, make sure Script Permission (but not Execute) is enabled at the web root. (You will get an HTTP 500 error if there are no write privileges.)
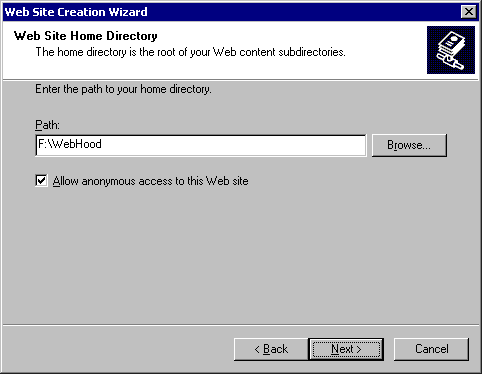
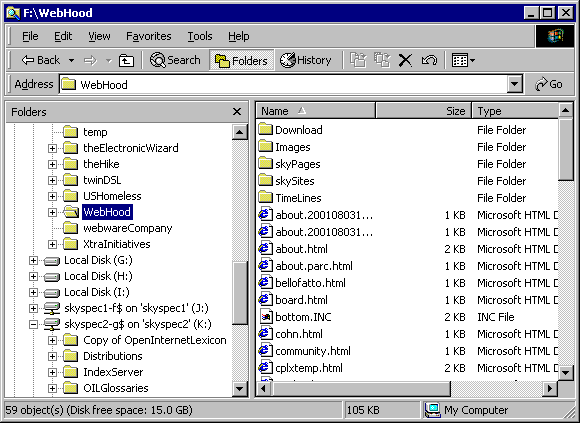
Now enter the actual physical location on the host system where the web site will serve. This step presupposes that you have already created a base level folder - F:\Webhood in this example - that will serve as the web site root.
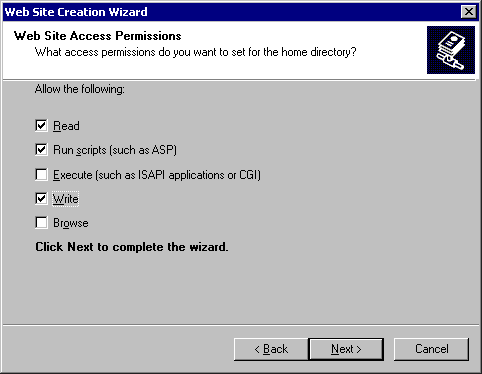
Set the site permissions to Read, Run scripts, and Write.
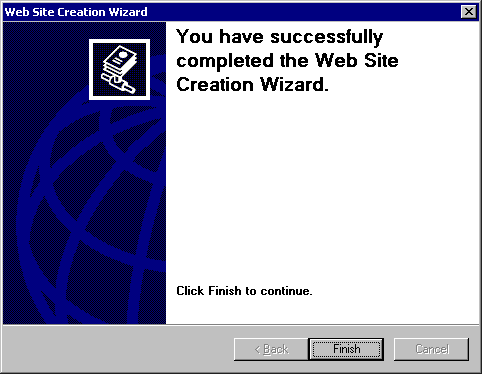
Simply click the Finish button to end the Web Site Creation Wizard.
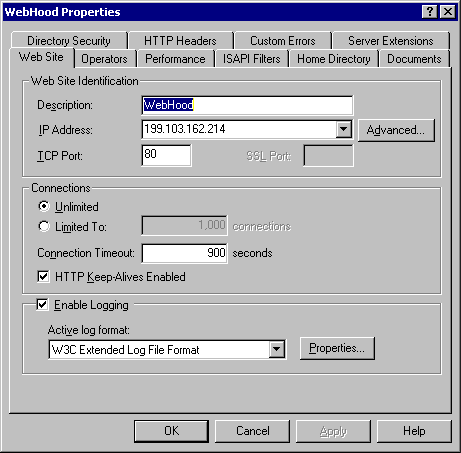
Now that the web site has been created it must tweeked. Back in the Internet Information Services panel (if not already open click Start > Programs > Administrative Tools > Internet Services Manager), right click on the new web site ("webhood.org" in this example). Set the IP address and TCP/IP port address accordingly.
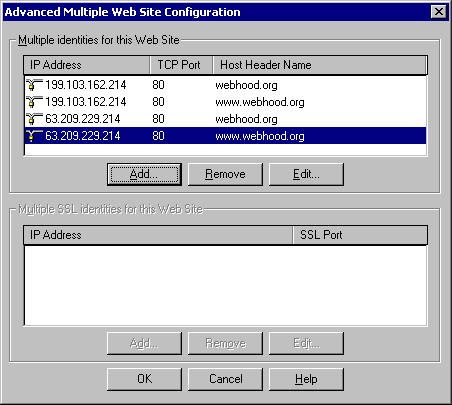
From this same panel now click the Advanced button, bringing up the Advanced Multiple Web Site Configuration panel. Add two records for each network interface card (NIC) in the server's system: each record should have the IP address corresponding to the NIC card in the server and the appropriate TCP/IP port number (80). The first record should have a host header value which is the actual domain name and the second record should have its host header set to "www." + "domain.com" (where "domain.com" is same domain name as used with the first record). This ensures that your web site will be found both with and without the www prefix.
Now go back to the Internet Information Services panel, Home Directory tab, and ensure that the Read and Write checkboxes are checked off. (It also may be useful to have the Log visits and Index this resource checkboxes checked.)
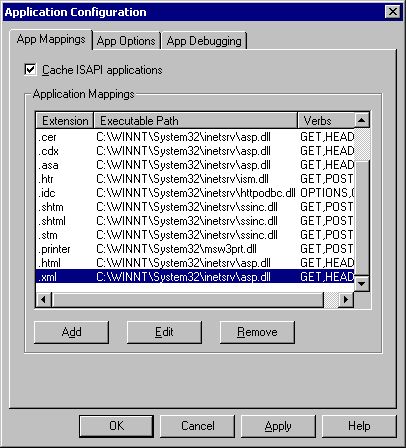
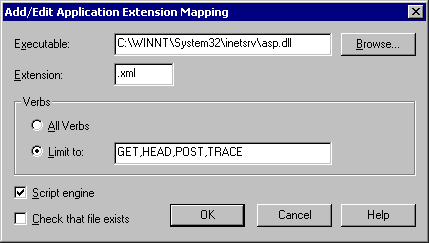
From the same panel click the Confiuration button, opening the Application Extension Mapping panel. Under the App Mappings tab, you must Add the extensions .html and .xml, and map them to the asp.dll. In our case, we supply the path C:\WINNT\System32\inetsrv\asp.dll. Study the settings for the .asp extension, and make the new settings for the .html and .xml extensions identical. Make sure that only the verbs "GET, HEAD, POST, TRACE" are used.
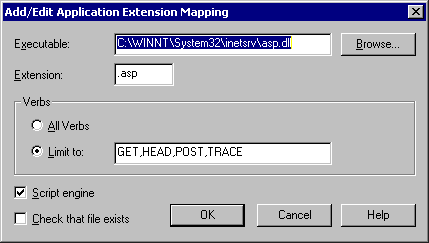
From the same panel first click the Edit button. Opening the Add/Edit Application Extension Mapping panel, get .asp extension settings.
Then from the same panel click the Add button. Opening the Add/Edit Application Extension Mapping panel, now create .html and .xml extension settings.
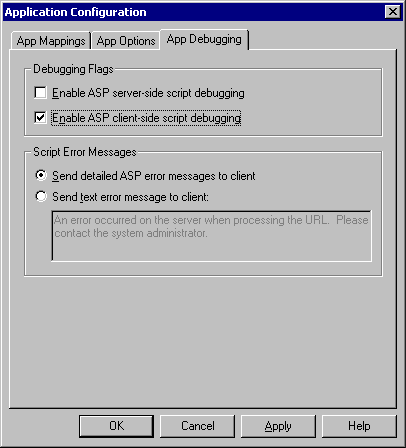
Go back to the Application Confiuration panel - you will be there after finishing your adding new Application Extension Settings and click open the Application Debugging tab and check off the settings as shown below. Under the App Debugging tab, turn on Client-side script debugging. You chould have the Microsoft Script Debugger installed on your principal testing machine (browser).
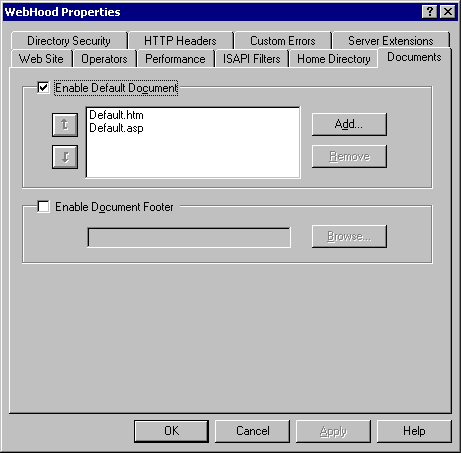
Now go back to your web site properties panel - you will end up there as you close the spawned panels from completing the above steps - and click on the Home tab. Delete the Default.htm and Default.asp entries.
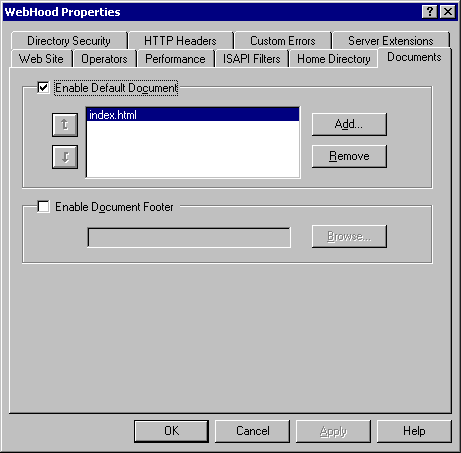
And Add an entry for index.html.
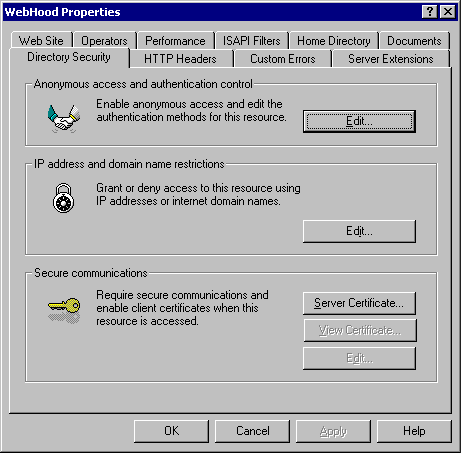
After doing that, now open the Directory Security tab and click the Edit button in the Anonymous Access area (at the top of the panel).
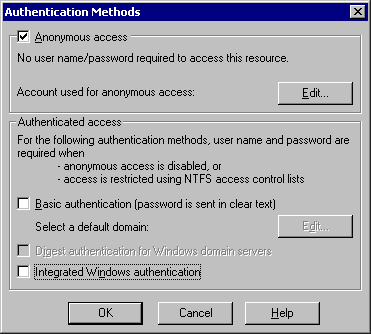
Under Anonymous Access and Authentication Control, click Edit. Check Anonymous Access checkbox, uncheck Basic Authentication and Windows NT Challenge/Response, as follows:
This concludes all modifications needed to be performed throught the Internet Information Services interface. The following describes the second step of this process, where various user permissions are applied to the web site directory tree.
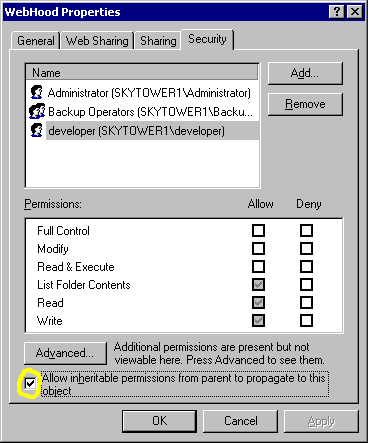
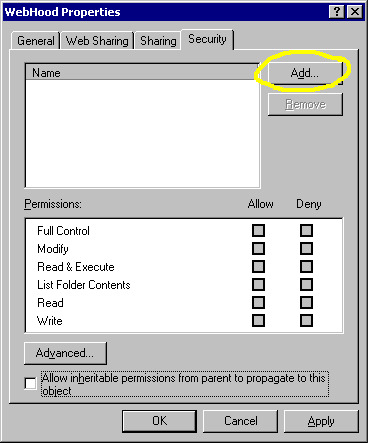
The permissions properties of the physical folder where you will serve the site from must be adjusted. Using the Windows Explorer right click on your physical site folder. (For instance, in our example we would right click and bring up the properties panel of \\skyTower1\F\webhood.)
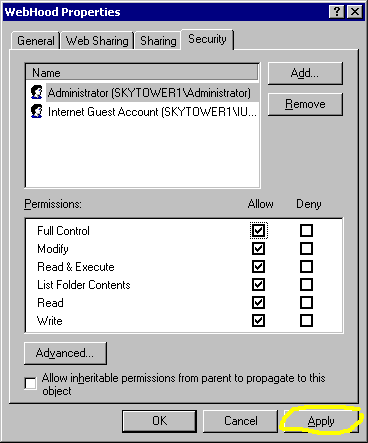
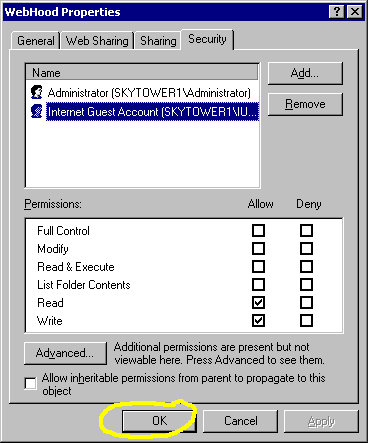
In the security tab of the properties panel Remove the Everyone user, if present, and add the Administrator user with all privilidges and also add the Internet Guest user with only Read and Write priviliges. If the "Allow inheritable permissions" checkbox is check (circled below), uncheck it.
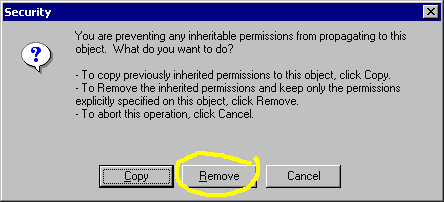
Unchecking the "Allow inheritable permissions" checkbox will bring up the following warning box. Don't be alarmed. Go ahead and click the Remove button, which delete the listed users.
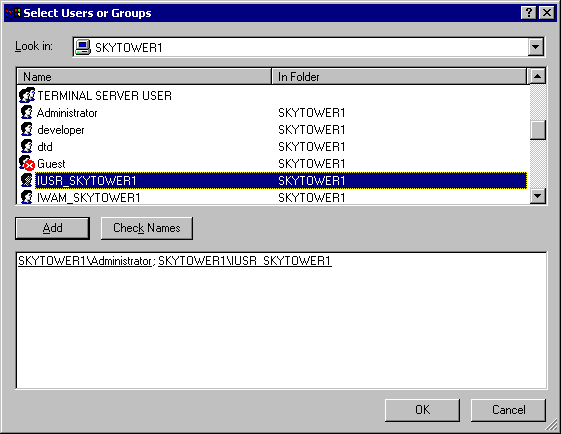
Simply click the Add button.
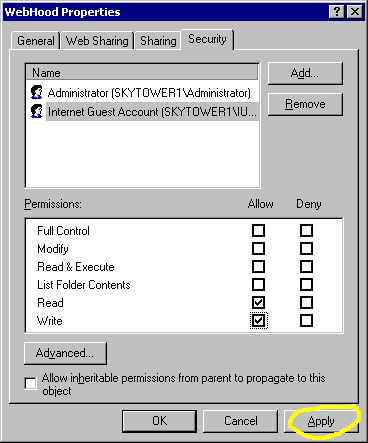
Then reselect users who will have priviliges associated with the base web site folder and all its subfolders and files. The users you select are the Administrator and what is called the IUSR (Internet Guest User).
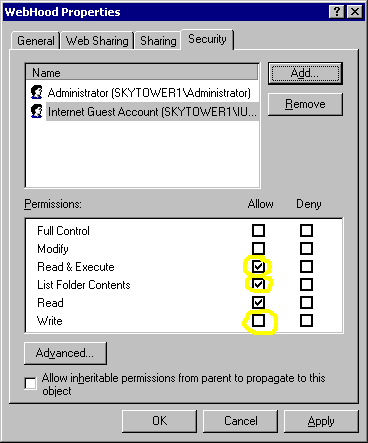
After selcting the Administrator and IUSR users. CLick the OK button bringing you back to the previous Security tab of the Properties panel. Observe the circled circled checkboxes.
Make sure that for the IUSR that only the Read and Write checkboxes are checked. Then click the Apply button to save your choices.
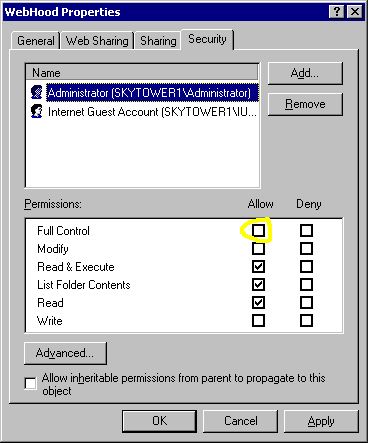
For the Administrator user check the box for Full Control, also circled. Checking this will automatically check all the boxes.
Again hit the Apply button to save your changes.
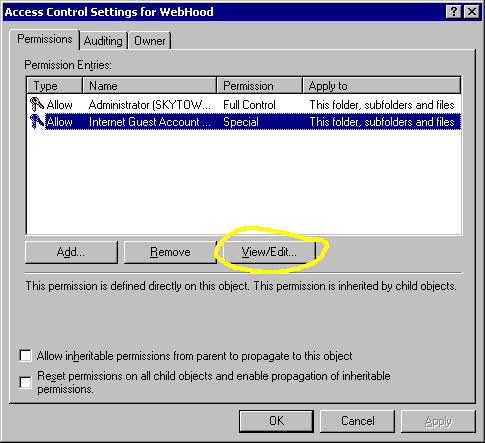
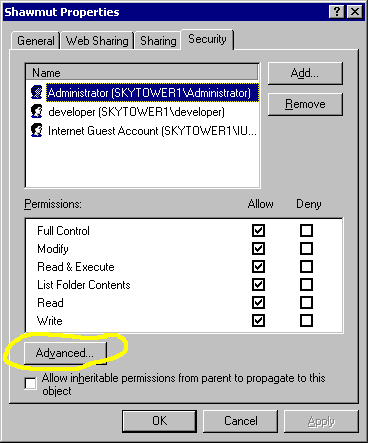
While in this same the Security tab of the Properties panel, click the Advanced button, bringing up the Access Control Settings panel, which brings up the following subpanel. Highlight the IUSR and and click the View/Edit button.
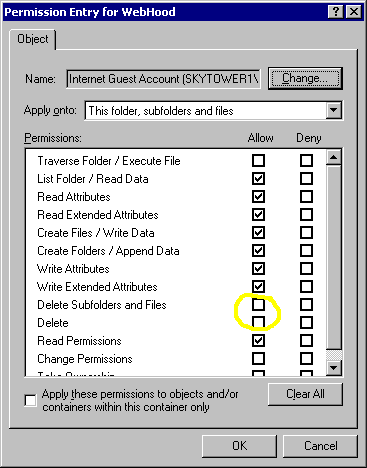
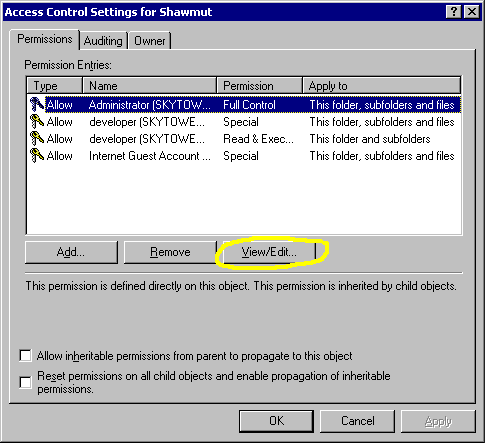
This brings up yet another subpanel for the IUSR permissions. Now enable the Delete Subfolders and the Delete permissions checkboxes (circled below).
Also make sure that you have unchecked the "Apply these permissions ..." checkbox (circled below).
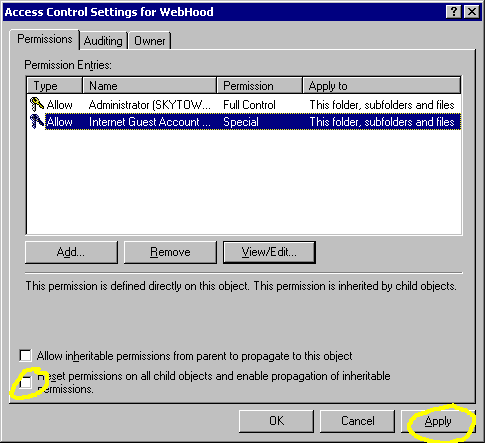
Clicking the OK button from the previous illustration will bring back to the following panel. Make sure to check the "Reset permissions on ..." checkbox and click the Apply button to save your changes.
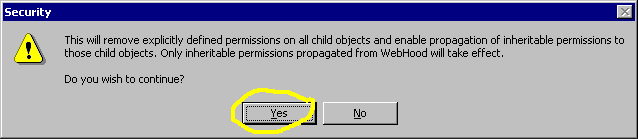
Don't worry about the warning box. Simply click Yes and proceed.
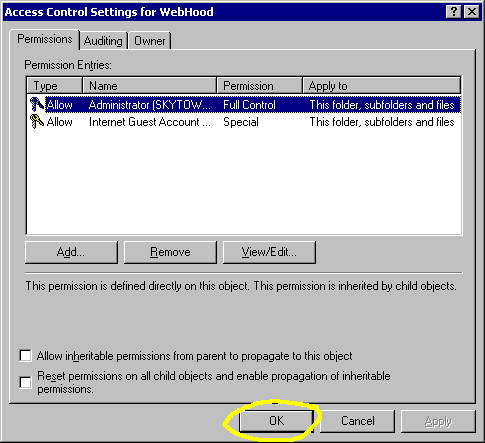
Now check the Administrator control settings, performing the same steps as we did for the IUSR, clicking the View/Edit button and entering the associated subpanel. After you have returned from the subpanel click the checkbox to "Reset permissions on all child objects" and then click the Apply button. (If the Apply button is greyed out it means that your changes were previously applied so simply hit the OK button.)
Click the OK button in the base level properties panel. If you are creating a new web site this is the final step: please skip to the last paragraph of this document.
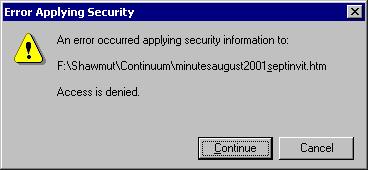
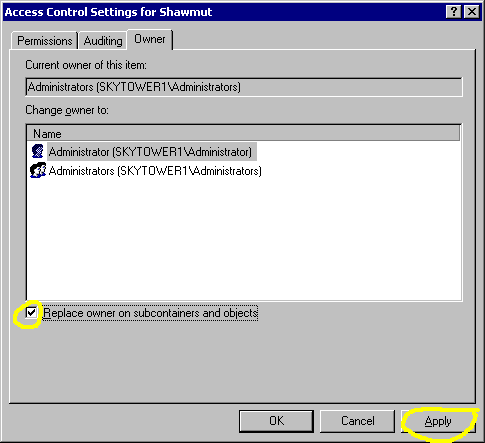
If you are migrating a pre-existing web site you may encounter file an ownership problem with your web site file and folder security. You must ensure that the Aministrator is the owner of the all your web site files and folders. You may see the following warning/error panel while setting the priviliges for your web site files and folders.
If this happens go back to openning up the properties panel on the web site base level folder and click the Advanced button.
In the resulting subpanel highlight the Administrator user and click the View/Edit button.
In this Owner tab of the Access Control Settings panel make sure that the "Replace owner" checkbox is checked and click the Apply button to save your changes.
Your server should now be running. If it is not try right clicking the web site server entry in the Internet Information Services panel and then clicking Start.
You may now begin accessing a skyBuilders timeLines session across the web.
II. Modifying the Web Site Properites
III. Setting Web Site File and Folder Permissions

IV. Site Migration and File Ownership Consideration
 Trouble Shooting: If you are having a particularly difficult time fine tuning your web service please refer to the following document link discussing the nuances of various Windows 2000 file and directory permissions: IIS NTFS Permissions
