
|
Windows 2000 OS Install Howto |
| Jesse Burkhardt |
The following is a photographic chronology of the installation of Windows 2000 Server onto a typical computer. The installation is fairly straightforward. Confusion arises, however, when presented with system server componant selections. Making the proper componant selections is discussed near the end of this document.
* You may have to ensure that the order of your boot devices is set in your BIOS setup. Ususally the order is set to boot from floppy, then CDROM, and then hard drive. If your floppy is empty and you have the installation CDROM in the tray, then the system will boot from the CDROM.
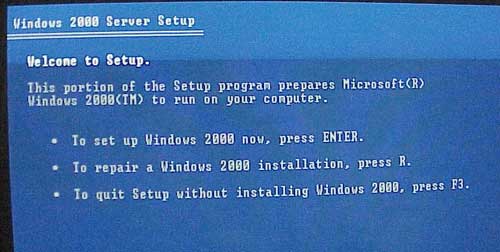
Below is a picture of the initial screen seen when booting off of the Windows 2000 Server Installation CD. Select the first option by pressing the ENTER key.
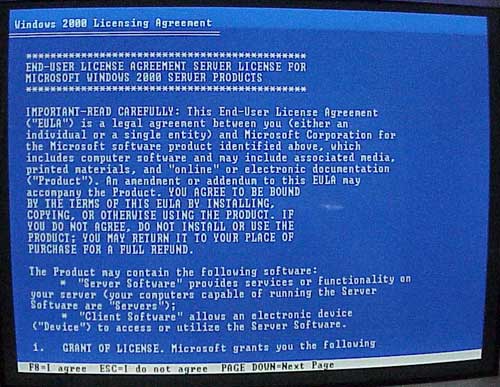
Hit the F8 key in order to accept the End User License Agreement (EULA).
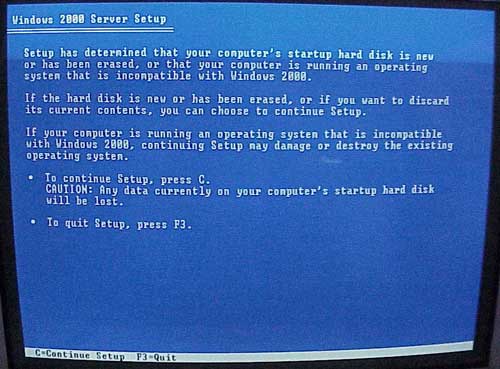
Next, hit the C key to continue the Setup installation.
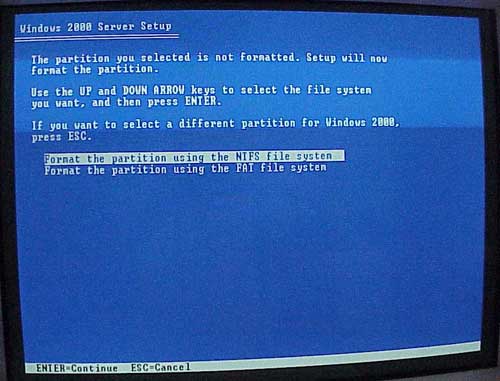
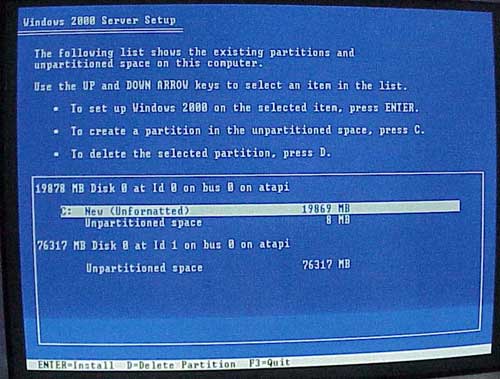
Using the arrow keys if necessary highlight the NTFS file system format option and then hit the ENTER key to procede.
You will then want to format the disk where the OS installation will be written to. Hitting the ENTER key will achieve this.
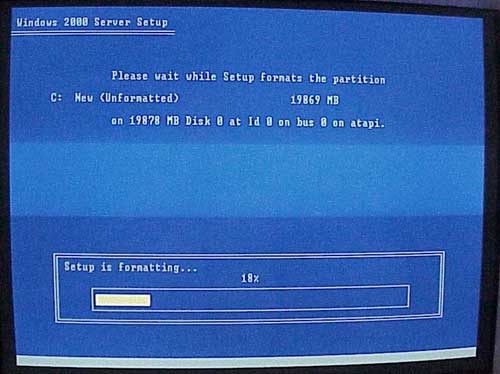
After the disk format has begun you will see a typical progress bar.
The OS hard disk now having been formatted the installation process will now go into a reboot cycle and prepare to actually install the necessary OS software. The CDROM should still remain in the tray.

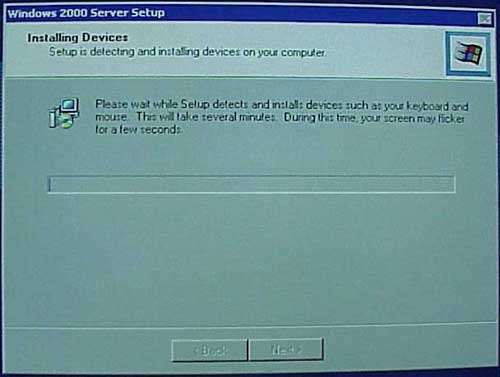
Once the installer has loaded you will notice that it will copy all of the OS system and device driver files that your computer will need.
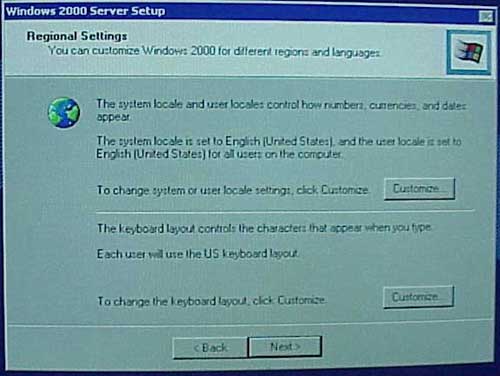
You will then be queried for your regional settings.
The you must register yourself and your organization.

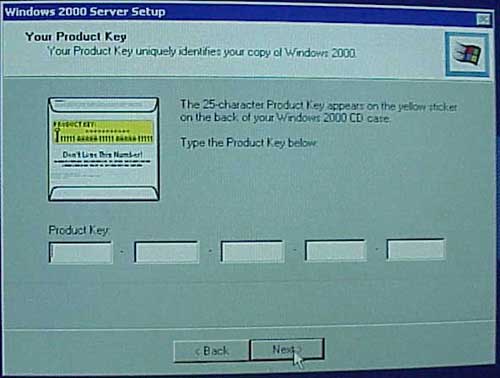
Before the OS can be enabled a 25 character license key must be entered as proff of ownership of the OS software.
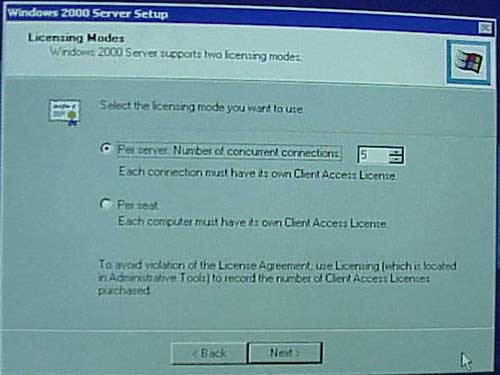
Accept the default 5 seat license unless you have reasons otherwise why not to do so.
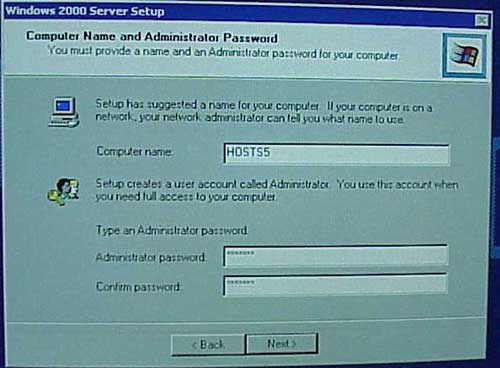
Give your server a host named and set the Administrator password.
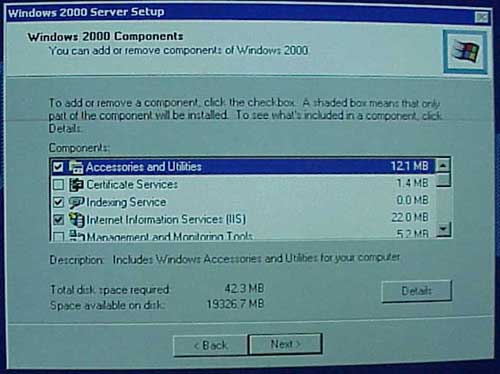
Now comes the configuration of your server componants. Hit the down arrow to highlight the Internet Information Service (IIS) componants. Hit the Details button to bring up subcomponant options.
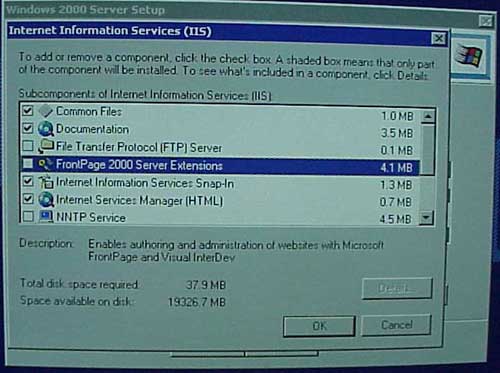
We usually uncheck the MS Frontpage option as we never use it. Check or uncheck the SMTP and FTP services as to your liking.
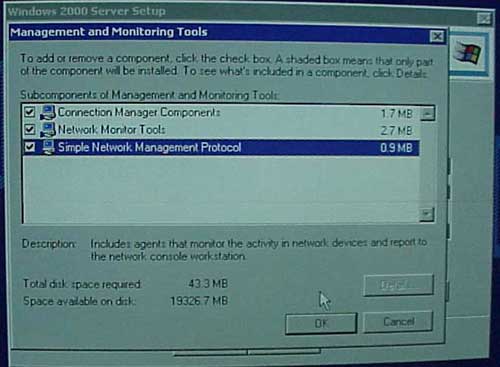
After clicking the OK button in the IIS details panel you will be back at the componants interface. Hit the down arrow until you highlight the Management and Monitoring Tools componant. Again hit the Details button to reveal these subcomponants as follows. (We like to have SNMP capability.)
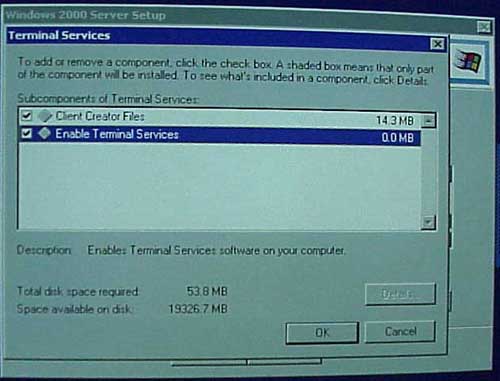
Again, after clicking the OK button in the Management and Monitoring Tools details panel you will be back at the componants interface. Hit the down arrow until you highlight the Terminal Services componant. Hit the Details button and enable both options.
You will now see and end of installation wizard graphic. At this point you will need to remove the CDROM and reboot the system for its initial boot. You will now be ready to layer in the various Service Packs exploit Hotfixes and application software that you will need.
