 |
howTo Install the |
| by Jesse Burkhardt begun on 2001/12/18, last modified on 2001/12/18 |
|
This document which details the installation of a Windows 2000 SMTP (Simple Mail Transport Protocol) server is meant to serve as an appendix for this document detailing how to install a Windows 2000 web server. The main purpose installing the SMTP server is for users of skyBuilders timeLines backed web server installations to be able to email bug reports from actual timeLines applications as bugs are discovered. There may be other email functionality layered into timeLines in the future also making use of SMTP services.
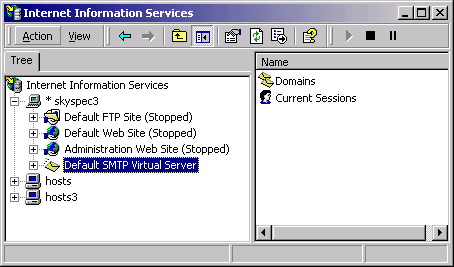
The first step in configuring your SMTP server is to invoke the MS Internet Information Services (IIS) interface: Click Start > Programs > Administrative Tools > Internet Services Manager, bringing the following display.
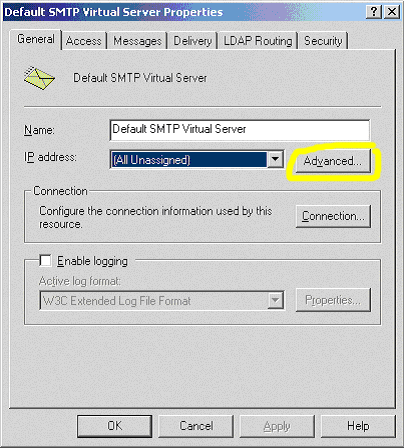
In the General tab of the overall display click the Advanced button to bind IP addresses and port numbers to the SMTP service.
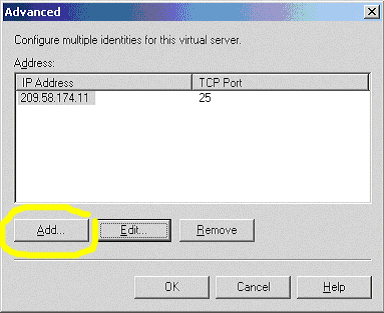
This will bring up the Advanced display where you will want to Edit or Add IP address and port number information. In this case we will add a new IP/port pair to an existing one.
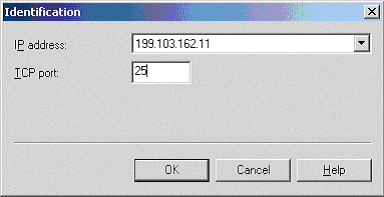
Port 25 is the default SMTP port. The IP address used is, of course, the static IP number bound to you ether network interface card (NIC). If you are dually homed you will want to added IP/port bindings for each of your NICs.
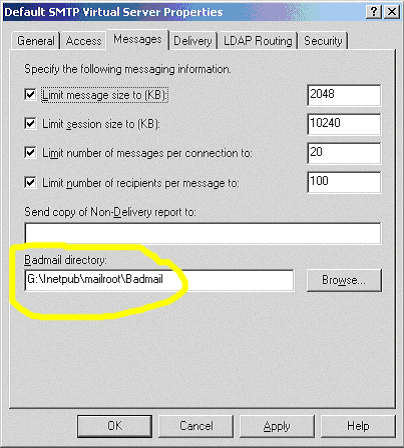
Next click on the Messages tab and make sure that your Badmail directory path, off of the mailroot directory, which is usually below the Inetpub directory, is correct. In a default Microsoft server installation the path is c:\Inetpub\mailroot\Badmail, but you should consider locating it in an area other that the default for security purposes. Hackers know where open ports may be in default configurations. For the same security reason it may be also prudent to use a port other than 25 to bind the SMTP service to.
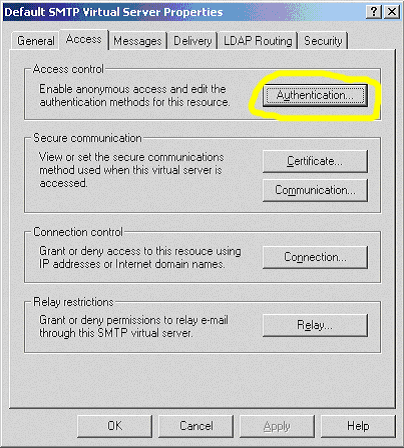
Next go to the Access tab and click the Authentication button.
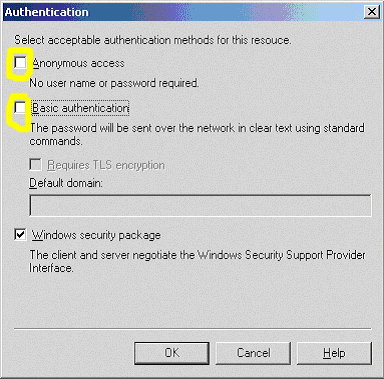
Uncheck the Anonymous access and Basic authentication checkboxes. allowing an internet visitor to launch an email through a web site.
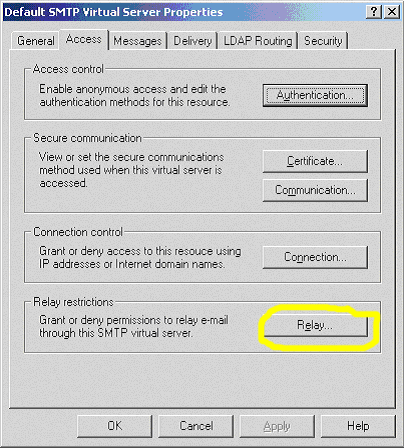
Now, back in the Access tab on the IIS interface, click on the Relay button.
It is important to uncheck the Allow checkbox to reduce relay access to the SMTP server. It is also very prudent to not allow any computers or domains SMTP relay access to the system you are configuring. You can incur a lot of unwanted traffic once the world discovers you are a wide open promiscuous mail relay.
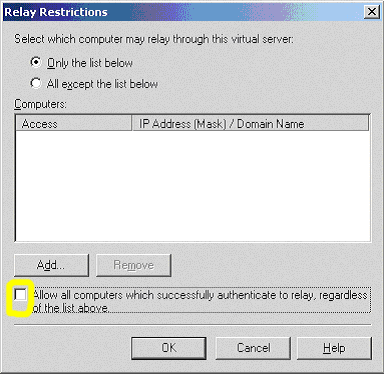
You may now exit it out of the SMTP server properties portion of the IIS interface. Make sure to click all Apply and OK buttons as you exit each level of the interface. This ensures that your changes will be saved.
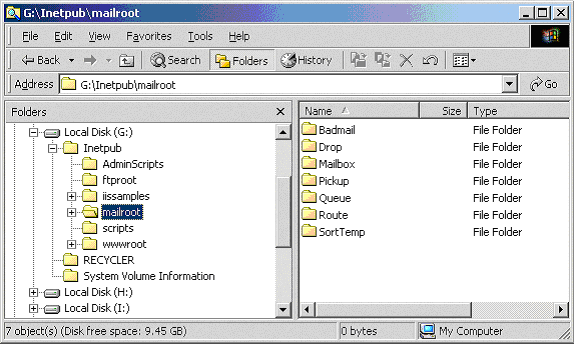
Now you must give the Internet User (IUSR) nominal privileges on the actual physical area where the SMTP maillroot is. Using the file explorer navigate to the folder, mailroot, and right click on it to invoke a Properties display interface.
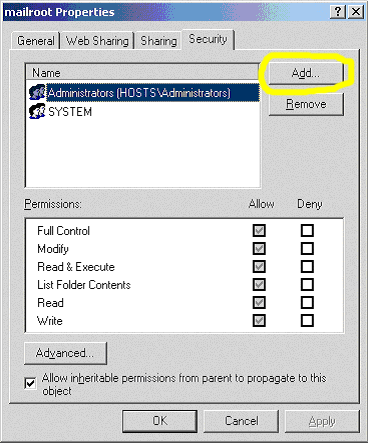
In the Security tab of the Properties display click the Add button.
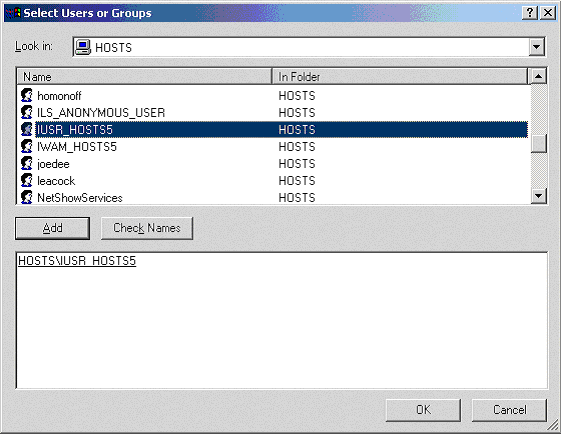
In the resulting Select Users and Groups display scroll to the IUSR user and highlight it and click the Add button. (The IUSR user usually has the machine's hostname appended to it, as is illustrated with IUSR_HOSTS5.)
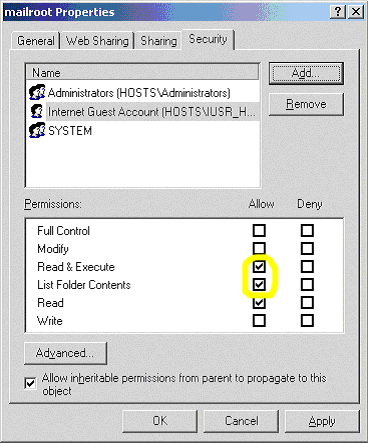
After hitting the OK button from the previous illustration, you will return to the mailroot Properties interface. You will now see that the IUSR has been added to the mailroot access list. The read & Execute and the List Folder Contents privileges are on by default. Uncheck them, the IUSR does not need them and it is prudent to keep access to a minimum.
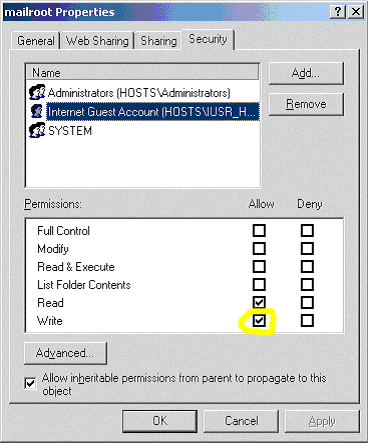
Now click the Write privilege checkbox so email failures will be deposited to the Badmail subdirectory.
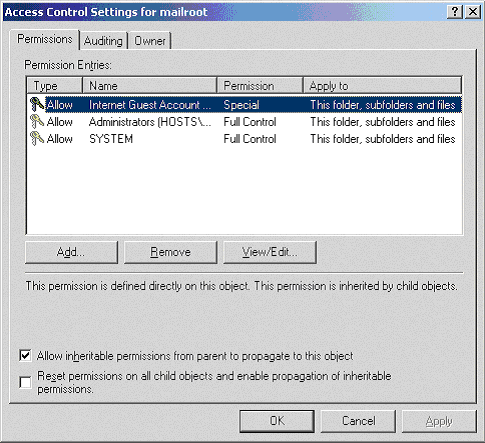
Then click the Advanced button of the same panel to bring up Access Control Settings for mailroot panel and highlight the IUSR.
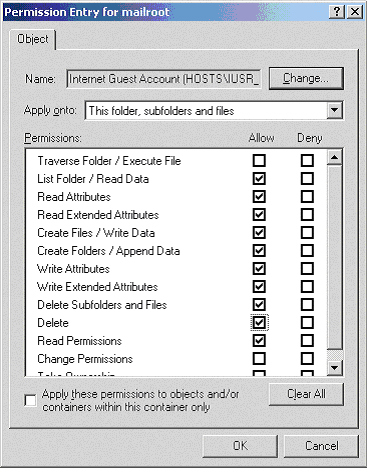
Then click View/Edit button to bring up the Permission Entry for mailroot panel.
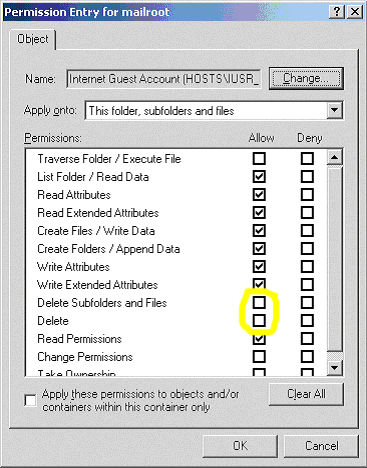
Check the Delete Subfolders and Files and the Delete checkboxes and make sure to click all Apply and OK buttons as you exit each level of the interface, ensuring that your changes will be saved.
This completes your installation of your SMTP server.
